Project architectural design: Stefani Conniff Design 310-415-3121
Project contractor: Matt Campbell Construction – 310-849-7268
Project Portfolio
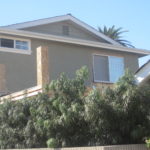
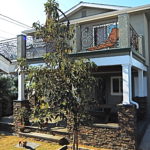
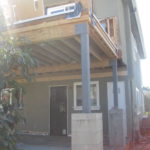
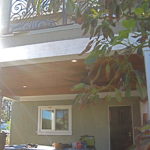
The objective of this project was to add a two story deck to the back of the existing house. The owner had been thinking about this idea for over 5 years, and now he decided it was time to make the vision come to reality.

Initial meeting
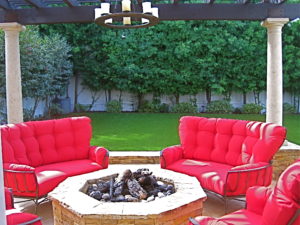
Our first design meeting was very efficient and easy. We talked about the owner’s vision to add an upstairs deck with a jacuzzi off the master bedroom and a downstairs patio below for outside living and entertaining. The style of the house is a simple California Ranch style home with added traditional elements, as in a front porch with a wrought iron railing and white trimmed windows. I liked the earthy look of the house and I decided to base my color scheme on the sage-green-grey stucco color and overall nature-inspired feel of the house.
Brainstorming and planning
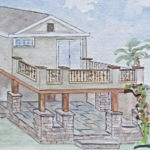
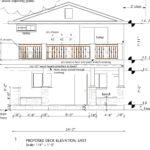
The main challenge of the project was to design and built a deck that can hold a 3000 pound jacuzzi on the second floor without possibly disturbing the interior of the house. So I quickly dismissed the idea of a cantilever, as this would have involved an enormous disruption of the existing home. Another challenge presented itself with the 4′ overhang of the second story, so technically the walls below did not line up for possibly supporting a structure. After some consideration, I decided to design a deck that basically stands on its own 4 legs, so to speak, and it only would appear as if it is attached to the house. My second instinct was to raise the lower patio to the level of the house, so the step down would now occur into the garden, and the patio would serve as an extension to the kitchen. The owner quickly agreed to the design ideas and we were off to shop for the hard surfaces of the project.
Design and color considerations
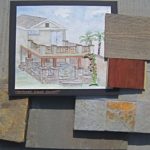
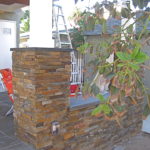
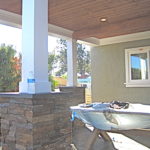
I felt that the deck/patio structure had to have some weight as well as an architectural presence, so it would not look like an add-on, but instead, it would appear as a planned part of the whole. Inspired by its earthy appearance, I decided to keep the natural look of the house. I added ledger stone for the columns, T&G siding for the ceiling and white trim to tie in the existing casing around the windows. However, we allowed the shopping trips to cement the color scheme. Early on, we had discussed stamped concrete for all the walking surfaces. I always appreciated the ease, flexibility and price of the patterned cement, but one visit to the stone yard convinced us that the natural stone is the way to go.
Stone and tile choices
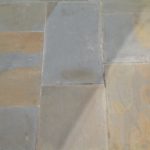
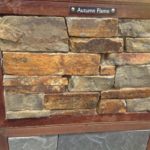
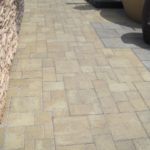
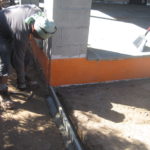
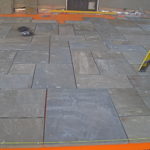
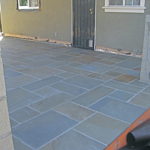
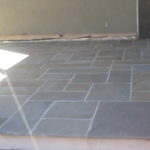
We fell in love with the big blue stone slabs that were laid in a random pattern. The beauty of this particular stone is next to none, and this became our color and look of choice and I built the rest of the elements around this floor. We picked a ledger stone with a combination of rust, grey and greens to compliment the stucco as well as the stone color.

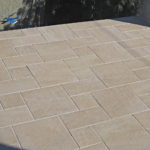
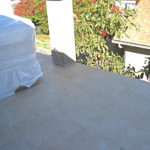
As quick and easy as we made our choices for the patio, the upstairs deck presented tougher challenges. We contemplated the use of slate, stamped concrete and pavers for possible solutions, but each element posed a separate set of issues and neither material felt quite right. While in the showroom, the owner kept returning to this simple cream tile laid in a weave pattern. He was responding to the simple, light and neutral look. My main concern was that whatever surface we picked, it had to be as non-slippery as possible. In fact, I really was not comfortable with anything that was remotely unsafe when stepping out of the jacuzzi with wet feet. After our second trip to the showroom, we hit the jackpot. The salesgirl showed us this beautiful creamy tile that not only came in different sizes and patterns, but it was completely slip resistant. This is a fabulous product, and it did not disappoint in the installation. It shines with the grace and beauty of soft limestone and it surprises with the durability and slip resistance of a slate. With our final choices at hand, we were ready to start the bidding and construction process.
Click here for more info on the product Crossville porcelain tile “Garden”

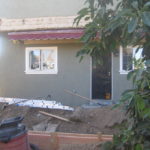
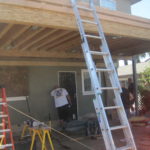
Construction begins
As with all of my projects, it is important to me that the main idea and look of the design follows into every detail of the structure. Even though we picked the main components for the patio and deck, all the little architectural elements in support of the design still needed to be observed and discussed. I prefer to use Matt Campbell construction, as Matt is a finished carpenter and contributes a lot of knowledge when it comes to finishing detailed woodwork . However first things first, and that meant we started by digging big holes and trenches for the extensive foundation. Our main structure was comprised of 4 corner steel posts that were sunk into deep foundations. I like using Jeff from Pacific Coast structural engineering, as he still is able to design post and beam structures that mostly utilize wood beams. So even though we are supporting a heavy jacuzzi on top, we are only using 4 steel columns with (2) 5 1/4 x 18 PSL beams for support.
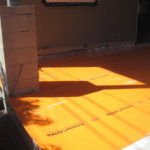
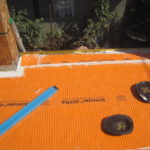
Stones and tiles
After the main structure was built, it was time to lay all the beautiful stone and tile. I picked a separate contractor who does exceptional stone work, as the overall look and quality was very important to the design. Our main worry was that the upstairs deck may leak, so in addition to hot mopping the surface, we also used the Schluter Ditro membrane as the underlayment. This system protects the integrity of the tile assembly , as well as serves as a water proofing membrane and vapor management layer. Really, what the Ditra assembly provided is protection from cracking and water leakage. It is money well spent when it comes to preserving the beauty and texture of your stone and tile.
Click here for more info on the Schluter-Ditra membrane
Like a big life-size puzzle, all the stone pieces were slowly falling into place and the floor shone in its beauty, grace and balance. This took a lot of artistic talent and eye for the whole, and I am so pleased with the beautiful patio.
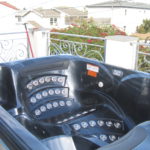
The jacuzzi
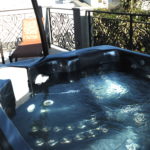
The owner picked out the Bugatti of all spas. He decided on a ” Thermospa” with all the bells and whistles, and the item is handsomely crafted and easily maintained. One thought that arose during construction was the : how do we get the tub up to the second story? After some discussion and pricing, they decided to use two cherry pickers and a lot of man power to hoist the 800 pound piece up on the deck, before the railing was installed. Now filled with water, it weighs 2800 pounds and will not likely move any time soon.
Click here for more info on Thermo spa

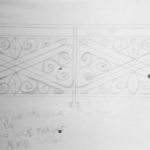
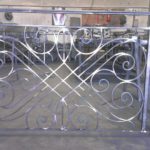
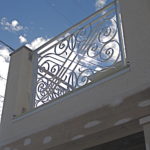
The railing
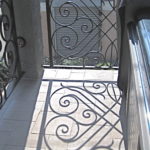
In our drive-by travels, I noticed that the owner gravitated to ornamental wrought iron railing designs. I had left this design item as a wait and see element, so after the structure emerged, I could determine how intricate the railing would actually be. The “iron man” came up with a beautiful design that was balanced, symmetrical and organic all in one, and we loved it at first sight and never looked back. It added the element of flow and movement to the structure and balanced its sturdy frame.
Details, details, details
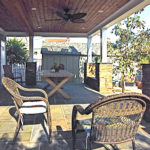
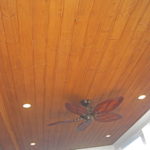
One of the remaining challenges was that of how to incorporate the second structural beam that stuck out one third into the ceiling of the patio. My design concept relied on the ceiling to appear as a unit and not as a fractured piece. I anticipated the look to be unified by the T&G ceiling application as well as the crown molding that we attached around the perimeter of the beams. Still, I was left with the question of emphasizing the beam and painting it white to match all the wood work, or staining it in hopes it would disappear. After some consideration, I decided for the stain, and I loved how everything fell into place and the ceiling presented a unified and purposeful whole. We added recessed LED lights and a attractive fan to complete the look. The electrician also added some copper dome fixtures in the columns, so the space can be washed in a soft light at night.
One of my favorite element was the use of the thick blue stone slab installed as the tread of the steps and the seat of the bench that we created between the two columns. It added such natural beauty to the design.
Another feature that I focused on in detail was the design of the columns. I envisioned them to be graceful, yet strong enough to hold up the structure. I spent some time balancing the dimension of each molding to create the perfect balance. I added two non structural columns for symmetry and definition and I loved the contrast of the white paint against the warm ledger and medium stain ceiling.


Waiting for the furniture and final clean up
Now all that is left to do is the final clean up, adding some grass and getting everything washed, sealed and shiny. And of course, it is time to buy all new furniture for the beautiful space.
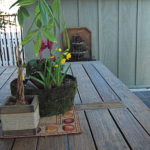
The owner fell in love with this driftwood colored sawbuck table that combines the element of the rustic and elegant outdoors. We are still waiting to find the right chairs to complement it, so stay tuned for that.

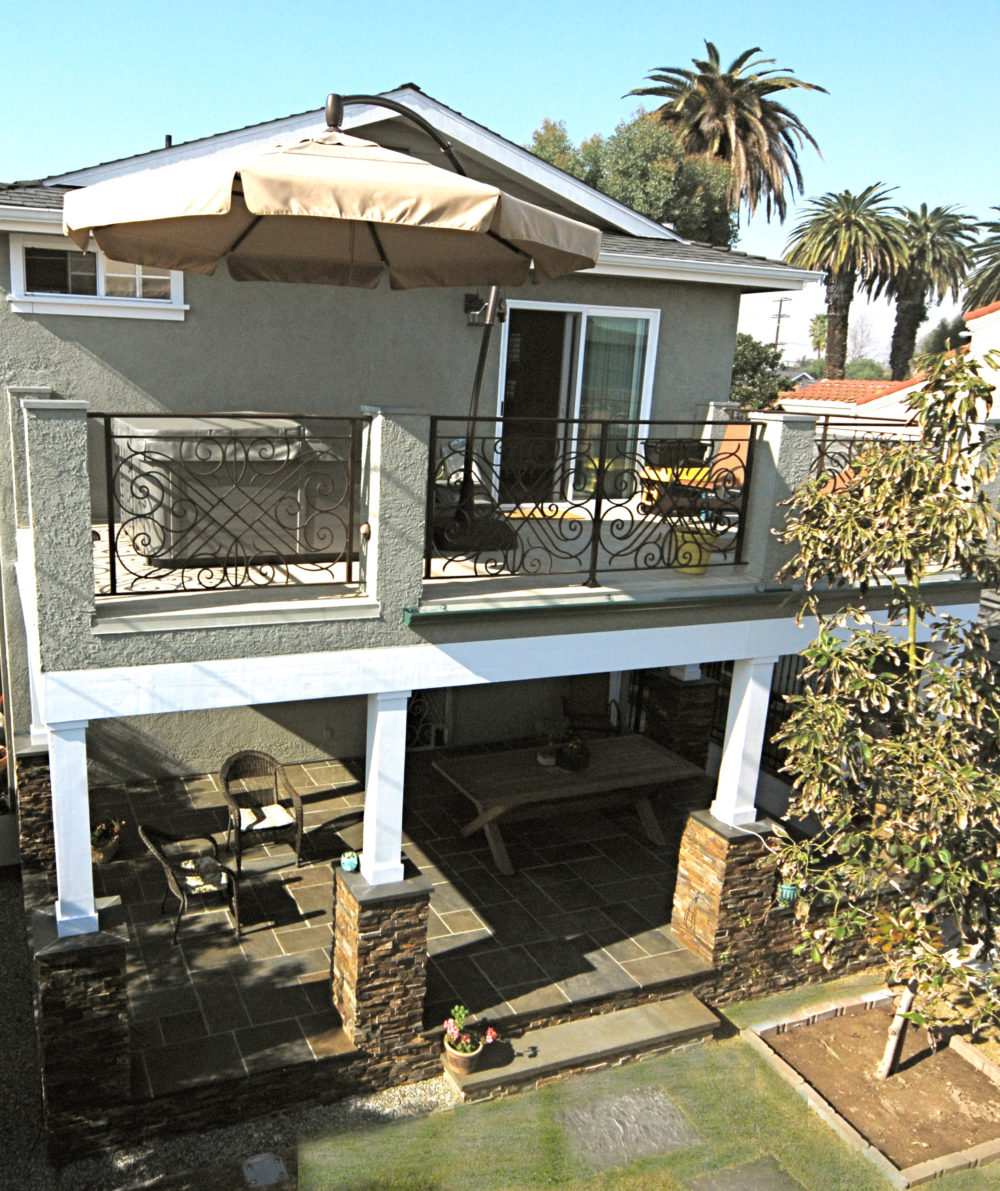
For upstairs, we replaced the cumbersome awning with this versatile umbrella that swings from one side to the other, depending on wherever the shade is needed. This kept the upstairs free of clutter and unwanted shade.

The space is looking forward to be put to good use, as a private spa area upstairs, as well as a common entertainment area downstairs. Two months after the completion of the construction phase, the owners could not be happier with the space. They use the patio everyday and enjoy the sunny space along with the comfort and tranquility of the colors.